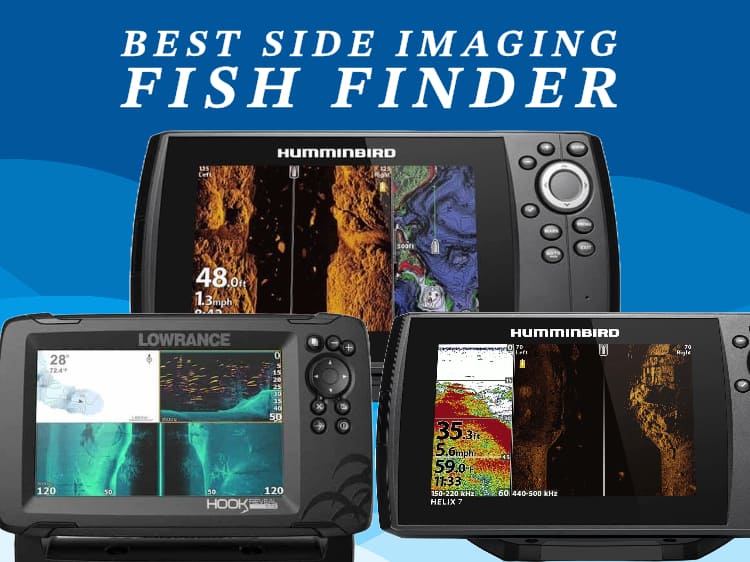
Side Imaging Fish Finder helps anglers get a clear and broader view of the area surrounding their boat, making it easier to locate fish, identify underwater structures, and understand the topography of the waterbed.
Side Imaging fish finders vary widely in price based on brand, features, and screen size. They can start as low as $400-$500 for entry-level models and can go up to $2,000-$3,000 or more for high-end, professional-grade units with large screens, multiple sonar technologies, and advanced mapping capabilities. However, for most recreational anglers, a mid-range side imaging fish finder typically falls between $500 and $1,500.
Here is a quick look at the best side imaging fish finders:
- Value for Money: Humminbird Helix 7 Mega SI
- Cheapest Side Imaging: Lowrance Hook Reveal 7x Tripleshot
- Best Side Imaging for Kayak: Humminbird Helix 7 CHIRP SI
- Best Maps and Side Imaging: Garmin Echomap UHD2 9″ SideVu Chartplotter
- Best Large Screen under $1000: Lowrance Elite FS 9
“Side Imaging” is the registered trademark of Humminbird and other fish finder brands have different proprietary names for this technology. Lowrance calls it “SideScan”, and Garmin calls it “SideVu”. Nevertheless, the fundamental concept remains the same: to provide clear and detailed underwater views to the sides of the boat.
Best Side Imaging Fish Finders 2024 – Review
1. Humminbird Helix 7 MEGA SI GPS G4
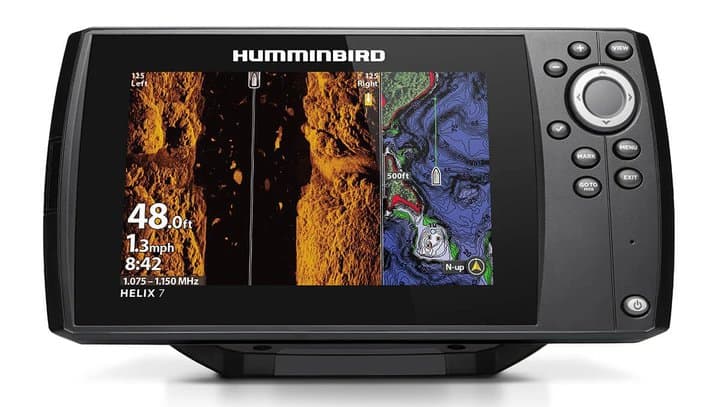
Key Side Imaging Features:
- Operating Frequencies: 455 kHz (440-500 kHz), MEGA SI (1075-1150 kHz)
- Depth Range (side-to-side): 800 feet @ 455 kHz, 250 feet @ MEGA
Humminbird’s Helix 7 MEGA SI (Side Imaging) offers the best value for money with its advanced sonar capabilities, especially the MEGA Side Imaging feature.
The “MEGA” in MEGA Side Imaging refers to its ability to operate at a higher frequency (1.2 MHz) compared to traditional side imaging. This higher frequency results in clearer, sharper, and more detailed underwater images. The images produced offer near-photographic quality, allowing anglers to easily identify fish, structures, and other underwater objects.
The Helix 7 MEGA SI also features MEGA Down Imaging and Dual Spectrum CHIRP sonar. When combined with side imaging, these technologies provide a comprehensive view of the underwater environment, enhancing the angler’s ability to locate fish and understand the underwater landscape.
The 7-inch display of the unit offers a clear and bright screen, which is crucial for interpreting the detailed images produced by MEGA Side Imaging. The display’s resolution and color depth make it easier for anglers to distinguish between different underwater objects and fish.
It also comes equipped with built-in GPS and mapping functionalities, allowing anglers to mark waypoints, track routes, and overlay side imaging data on maps for better navigation and location tracking.
Pros:
- Value for money in the $700 price range
- High-Resolution Side Imaging
- Wide coverage
- Down Imaging and Dual Spectrum CHIRP sonar
- 7-inch bright screen
- GPS and Maps
Cons:
- No touchscreen
2. Lowrance Hook Reveal 7x TripleShot
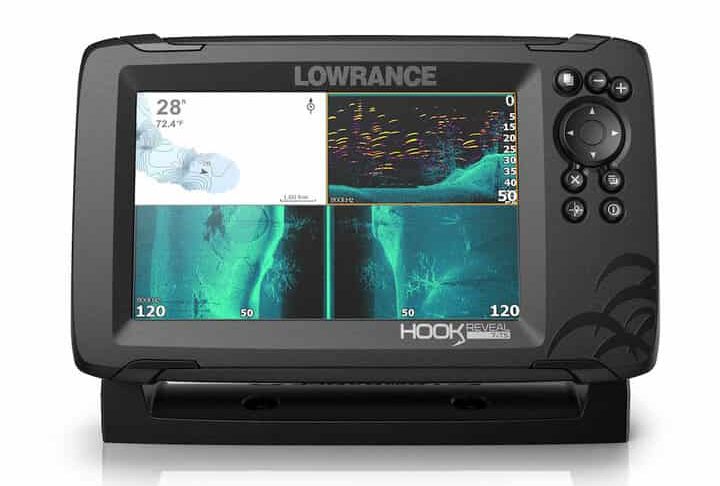
Key Side Imaging Features:
- Operating Frequencies: 455/800 kHz
- Depth Range (side-to-side): 600 feet
Lowrance’s Hook Reveal 7x TripleShot is the cheapest side imaging fish finder in the market. The “TripleShot” in its name refers to its three primary sonar capabilities: traditional CHIRP sonar, DownScan Imaging, and SideScan Imaging.
The SideScan Imaging of the Hook Reveal 7x TripleShot lacks the clarity and detail of premium models but it is good enough to identify structures and fish on both sides of the boat. This can be particularly useful for locating fish habitats, underwater debris, and other points of interest.
The unit offers decent side-to-side coverage, enabling anglers to scan a wide area next to their boat. This broad perspective is valuable for getting a comprehensive view of the underwater environment.
The 7-inch display is bright and clear even under direct sunlight. The split-screen views are handy when looking at SideScan and DownScan at the same time.
With the inclusion of traditional CHIRP sonar and DownScan Imaging, users can get a comprehensive view of what’s below the boat. This combination helps in identifying fish targets and differentiating between fish and structures.
Pros:
- Cheap
- Bright 7-inch screen
- CHIRP, DownScan, and SideScan sonars available
- GPS plotter
- FishReveal feature
Cons:
- Side Imaging lacks detail
- No Maps
3. Humminbird Helix 7 CHIRP SI GPS G4
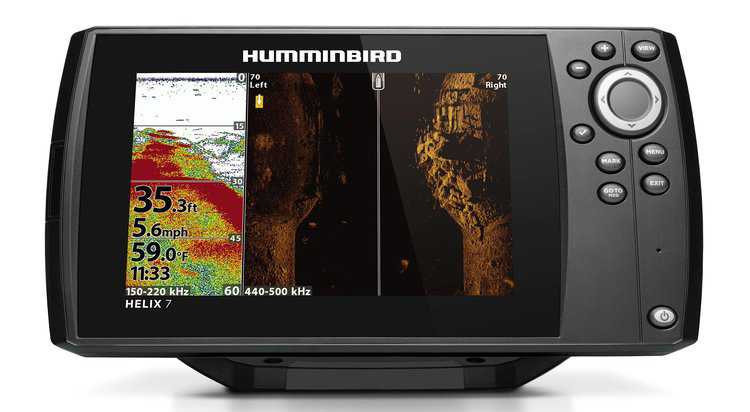
Key Side Imaging Features:
- Operating Frequencies: 455 kHz
- Depth Range (side-to-side): 800 feet
Humminbird’s Helix 7 CHIRP SI is the most suitable side imaging fish finder for Kayaks. The compact transducer of the Helix 7 CHIRP SI makes it a favorable choice for kayaks, where space and mounting options can be limited. A smaller transducer is easier to mount on a kayak, either through in-hull installations, scupper mounts, or on the side of the kayak.
The Side Imaging of the fish finder provides a good balance between detail and coverage. While it lacks the higher frequencies that can provide sharper images, the 455 kHz frequency still produces clear and detailed images, especially in freshwater settings. The images are generally sharp enough for identifying fish, structures, and other underwater objects.
The inclusion of Down Imaging (DI) and Dual Spectrum CHIRP Sonar complements the side imaging feature.
The GPS and Mapping capabilities combined with Side Imaging can help anglers understand the relationship between underwater structures and fish locations.
The 7-inch display of the unit offers clear visuals, making it easier for anglers to interpret side imaging data and other sonar returns.
Pros:
- Suitable for Kayaks and small boats
- Mid-priced
- Down Imaging and Dual Spectrum CHIRP sonar
- 7-inch bright screen
- GPS and Maps
Cons:
- Limited frequency range for Side Imaging
4. Garmin ECHOMAP UHD2 9
Key Side Imaging Features:
- Operating Frequencies: 455/800/1000 kHz
- Depth Range (side-to-side): 1000 feet @ 455 kHz, 400 feet @ 1000 kHz
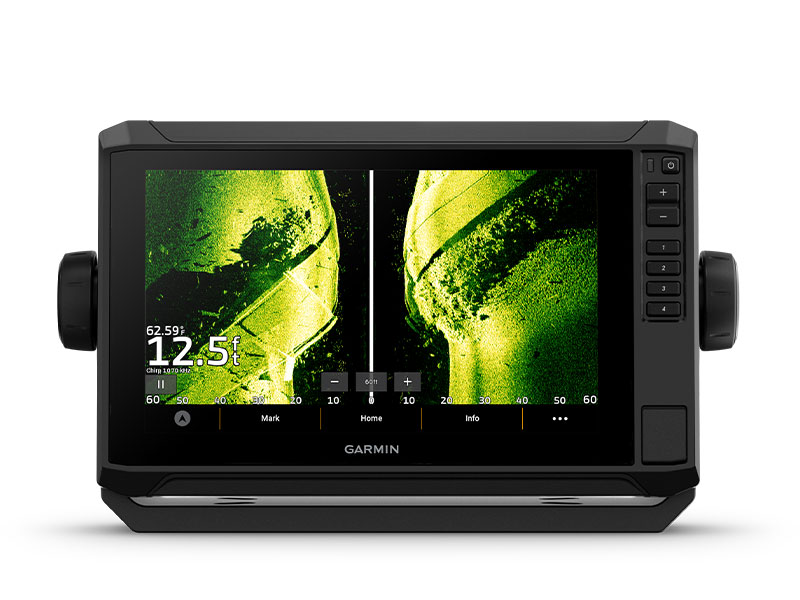
Garmin’s ECHOMAP UHD2 9 is a premium fish finder that offers an ultra high-definition SideVu, detailed mapping, and touchscreen.
The Ultra High-Def SideVu offers incredibly detailed images of the underwater environment to the sides of the boat. The higher resolution imaging means anglers can distinguish between structures, vegetation, and fish with greater clarity.
The SideVu is paired with ClearVu and high-wide CHIRP traditional sonar to offer versatile sonar capabilities.
ClearVu produces near-photographic images of the water below the boat and the the CHIRP sonar provides excellent target separation and clarity in a range of water conditions.
Another great feature is the compatibility with Garmin’s LiveScope technology. LiveScope offers real-time scanning sonar, allowing anglers to see fish movement in real time.
ECHOMAP UHD2 9 comes with Garmin Navionics+ U.S. Inland Mapping. This mapping feature provides detailed cartography for thousands of inland lakes and water bodies. It’s invaluable for
The touchscreen interface of the unit is intuitive and user-friendly. It offers a responsive touch experience, allowing users to quickly navigate through menus, zoom in on maps, or adjust settings.
Pros:
- High-definition Side Imaging and Down Imaging
- Large 9-inch touchscreen
- Detailed Mapping
- Networking capabilities
- Livescope compatible
Cons:
- Expensive
5. Lowrance Elite FS 9 with Active Imaging 3-in-1
Key Side Imaging Features:
- Operating Frequencies: 455/800 kHz
- Depth Range (side-to-side): 600 feet @ 455 kHz, 300 feet @ 800 kHz
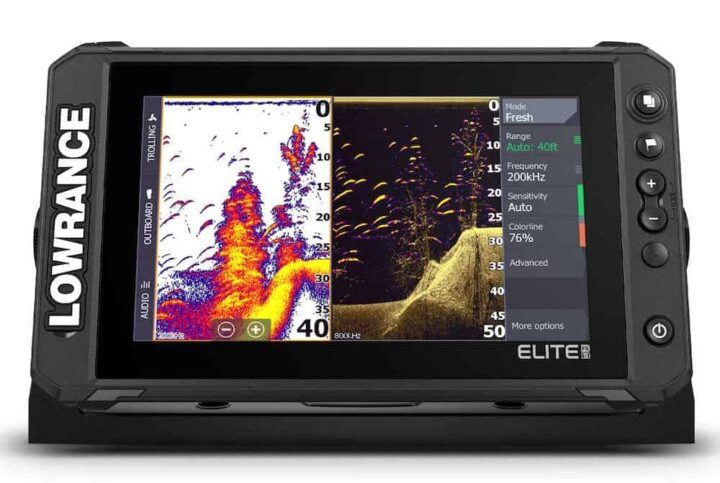
Lowrance’s Elite FS 9 offers a large screen and is the best touchscreen side imaging fish finder under $1000 budget.
The Elite FS 9 features Lowrance’s Active Imaging 3-in-1 transducer, which includes SideScan, DownScan, and CHIRP sonar. The SideScan feature produces detailed images of the underwater environment to the sides of the boat.
With Active Imaging, anglers can view structures and fish with more clarity and at a longer range than traditional standard imaging sonar. The images are sharp, clear, and provide an accurate representation of underwater objects.
Another unique feature that Elite FS 9 offers is the FishReveal. It combines CHIRP sonar fish and DownScan on one screen. This fusion makes it easier to identify fish targets.
Elite FS offers a large 9-inch touchscreen display. The interface is intuitive, and the touchscreen offers pinch-to-zoom capabilities, which can be especially handy when analyzing side imaging data.
Pros:
- Large 9-inch touchscreen
- Detailed side imaging results
- Down Imaging and CHIRP sonar
- GPS and Maps
- Live sonar compatible
Cons:
- Expensive
- Imaging not offered in MHz frequency range
What is Side Imaging
Side Imaging, also known as SideScan and SideVu, is a high-frequency sonar that scans the water on either side of the boat. It allows anglers to view detailed images of underwater structures and objects on both sides of their boat.
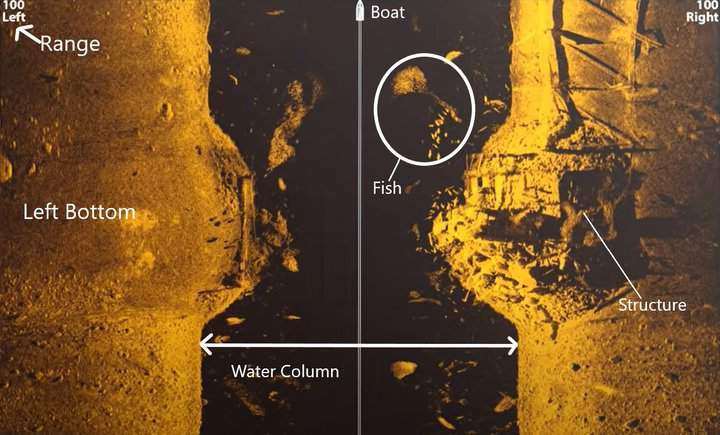
The heart of the side imaging fish finder is the specialized transducer. Unlike traditional sonar transducers that send signals directly downward, side imaging transducers transmit high-frequency acoustic beams to the left and right sides of the boat.
As these beams bounce off underwater objects and terrain, the transducer receives the returned signals. The fish finder then interprets this data to create a detailed, nearly photographic image of the underwater environment. This side-to-side perspective is typically presented on the fish finder’s display as two separate images, one for each side of the boat.
Side Imaging vs Down Imaging
Unlike Side Imaging, Down Imaging scans directly below the boat. But Down Imaging fish finder uses high-frequency sonar, similar to Side Imaging, to produce detailed, almost photographic images of the underwater environment.
Which One to Choose?
- Both: Many modern fish finders offer both side and down imaging capabilities. If you can invest in a model that offers both, it’s the best of both worlds. You’ll have the versatility to scan large areas quickly with side imaging and then switch to down imaging for a more detailed view once you’ve located a promising spot.
- Predominant Fishing Scenario: If you often fish in large lakes or unfamiliar waters where you’re frequently searching for new spots, side imaging is more beneficial. On the other hand, if you’re primarily fishing in familiar waters or focusing on vertical fishing techniques, down imaging could be more valuable.
- Budget: Fish finders with side imaging typically tend to be more expensive than those with just down imaging. Consider your budget and prioritize the technology that aligns most closely with your primary fishing activities.
Is Side Imaging Worth it?
Whether side imaging is worth it depends on your fishing goals, your typical fishing environments, and your budget. Here are some points to consider when evaluating the value of side imaging:
Advantages of Side Imaging:
- Detailed View: Side imaging offers near-photographic quality images of the underwater environment on both sides of your boat. This can help you clearly identify structures, fish habitats, and other objects in the water.
- Wide Coverage: Side imaging allows you to scan large areas of water in a short amount of time. This can be particularly useful when exploring unfamiliar waters or when trying to locate fish habitats quickly.
- Different Perspective: With side imaging, you get a horizontal underwater view, offering a different perspective than traditional sonar or down imaging. This can provide additional context and can be particularly useful for identifying structures like fallen trees, rocks, or sunken boats.
- Safety: In unfamiliar or shallow waters, side imaging can help you identify obstacles or potential hazards in the water, helping to navigate more safely.
Points to Consider:
- Learning Curve: Interpreting side imaging data can have a steeper learning curve compared to traditional sonar. It may take some time and practice to understand and read the fish finder effectively.
- Price: Fish finders with side imaging capabilities tend to be more expensive than those without. It’s important to weigh the benefits against the increased cost.
- Fishing Environment: If you often fish in small ponds or very shallow waters, the advantages of side imaging might be less pronounced compared to fishing in larger lakes or rivers.
For many anglers, especially those who are serious about their sport or who frequently fish in varied and unfamiliar environments, side imaging can be a game-changer. It offers a level of detail and perspective that can significantly enhance the fishing experience.
However, if you’re on a tight budget, primarily fish in familiar or small waters, or are not interested in investing the time to learn a new technology, it might not be worth the additional cost.
Which brand offers best side imaging
When it comes to side imaging technology in fish finders, several brands have earned reputations for producing high-quality and innovative products. The best fish finder brand often depends on specific needs, budget, and preferences. However, some of the most recognized brands for side imaging include:
1. Humminbird
Humminbird is often credited with pioneering side imaging technology in consumer fish finders.
Their MEGA Imaging technology offers some of the clearest and most detailed side imaging on the market, operating at a higher frequency than traditional side imaging.
Popular Humminbird fish finders include the Helix and Solix series, which are equipped with the MEGA Imaging and come in various screen sizes.
2. Garmin
Garmin’s SideVü technology provides high-definition side imaging. Their scanning sonars are known for producing clear and crisp images.
The Striker and ECHOMAP series are popular Garmin fish finders among anglers for their side imaging capabilities combined with other features like ClearVü (down imaging) and traditional CHIRP sonar.
3. Lowrance
Lowrance’s SideScan technology offers both side and down imaging capabilities. Their fish finders produce high-resolution images and are known for their ease of use.
The HDS Live and Elite FS series are the top Lowrance fish finders equipped with advanced side imaging features.
4. Raymarine
Raymarine’s SideVision technology provides high-clarity side imaging, and their fish finders are known for robust construction and advanced navigation features.
The Dragonfly series and Axiom series are popular choices equipped with side imaging technology.
How to choose Best Side Imaging Fish Finder
When choosing a side imaging fish finder, several factors can influence your decision. Let’s break down what to consider based on the below criteria.
Budget
A good budget for a side imaging fish finder typically falls within the range of $300 to $1,000. Within this range:
- Entry-level models ($300 to $500) will offer basic side imaging capabilities, typically with smaller screens and lower resolution.
- Mid-range models ($500 to $800) usually provide better screen resolution, larger displays, and improved sonar capabilities.
- High-end models ($800 to $1,000 and above) will offer the best side imaging technology, larger high-resolution screens, integrated GPS and mapping features, and often networking capabilities.
It’s important to note that prices can vary based on brand, features, and market conditions. However, as a general guideline, a budget of $500 to $700 will often get you a quality side imaging fish finder with a good balance of features suitable for most recreational anglers.
Transducer Frequency Range
- Higher Frequencies (800kHz to 1.2MHz): Provide more detailed images but might be less effective in deeper waters. Ideal for freshwater lakes and shallow coastal areas.
- Lower Frequencies (455kHz): Better for scanning deeper waters but may offer less detailed images.
- Dual or Multiple Frequencies: Some transducers offer dual or multiple frequencies, allowing you to switch between them based on the fishing environment. This can be a versatile option.
Screen Size and Display Resolution
A larger screen can make it easier to interpret side imaging data, especially if you’re viewing multiple panels (e.g., side imaging, down imaging, and GPS maps) simultaneously.
Higher resolution screens (measured in pixels) offer clearer and sharper images. This is crucial for side imaging, where detailed interpretation is essential. Look for a minimum of 800×480 pixels, but higher is better.
GPS and Maps
Fish finder with GPS allows you to mark waypoints, track routes, and view your boat’s speed. Essential for navigating and revisiting productive fishing spots.
Some units come with pre-loaded maps, while others offer the ability to create custom maps based on your sonar data. Consider if you need detailed lake maps or the ability to add maps in the future.
Check if the fish finder allows for map updates or if you can purchase and load additional maps as needed.
Networking
If you have multiple devices on your boat (like a trolling motor, radar, or multiple fish finders), you might want a fish finder that supports networking. This allows devices to share data.
Some modern fish finders come with Bluetooth or Wi-Fi capabilities, enabling features like software updates, map downloads, or integration with mobile apps.
Consider if the fish finder can be connected to other modules or sensors for future upgrades.
Choosing side imaging fish finder for Kayak
Choosing a side imaging fish finder for a kayak requires some specific considerations due to the unique nature of kayak fishing. Here’s what you should keep in mind:
- Size and Portability:
- Compact Design: Kayaks have limited space, so consider fish finders with a more compact design.
- Weight: A lighter unit is preferable for kayaks to maintain stability and ease of maneuverability.
- Mounting Options:
- Transducer Mount: Determine how the transducer will mount on the kayak. Some kayaks come with scupper holes designed for transducer mounting, while others may require an arm mount or in-hull mounting.
- Display Mount: Consider how and where you’ll mount the display. Adjustable and removable mounts can be beneficial.
- Battery Life and Power Source:
- Battery Life: Since kayaks don’t have onboard power sources like larger boats, choose a fish finder with good battery life.
- Battery Size and Weight: Consider how you’ll store the battery and its weight. Compact and lightweight batteries are preferable for kayaks.

